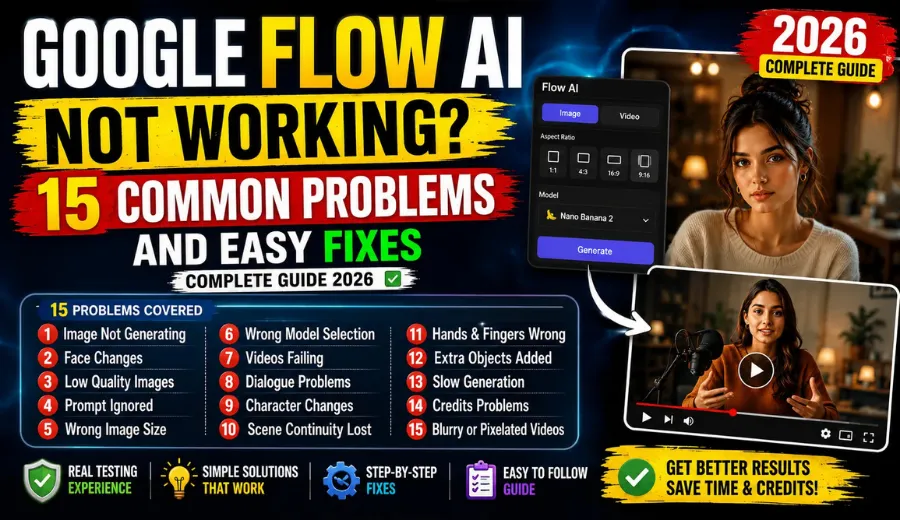
If you are looking for solutions to common Flow AI tool problems, this guide will help you fix them with simple steps. I have spent a lot of time testing Flow AI for creating both images and videos. At the beginning, I also faced many problems. Sometimes the image looked nothing like my prompt. Sometimes the face changed. A few videos failed without any reason. After testing different settings, prompts, models, and image sizes, I found what actually works. That is exactly what I am sharing in this guide.
I wrote this article from my own testing experience because I could not find one place that explained everything in simple words. This guide is for beginners as well as regular Flow AI users. I tested these methods while creating realistic portraits, talking videos, cinematic scenes, product videos, and AI photo editing projects. Most of these tips worked well for me, and I hope they help you save both time and credits.
1. Before You Start Using Google Flow AI
Before blaming the AI, make sure your basic setup is correct. During my testing, I noticed that many failed generations were not caused by the prompt. They happened because of small mistakes that are easy to fix.
Before creating any image or video, check these things.
- Make sure your internet connection is stable.
- Use a clear and high quality reference image.
- Keep your browser updated.
- Avoid opening too many browser tabs at the same time.
- Check that you still have enough credits available.
- Refresh the page if Flow AI feels slow.
- Save your prompt before trying again.
These simple checks solved many of my early problems.
2. How Google Flow AI Actually Works
Many people think Flow AI simply reads the prompt and creates an image. It is actually more complex than that.
Flow AI looks at different parts of your request at the same time. It studies your prompt, your uploaded image if you use one, the selected model, the image size, and many hidden settings before creating the final result.
That is why changing just one small line inside the prompt can sometimes give a completely different image. When I first started using Flow AI, I kept changing the whole prompt every time something went wrong. Later I realized that changing one small detail at a time gave much better results. It also helped me understand which part of the prompt was causing the problem.
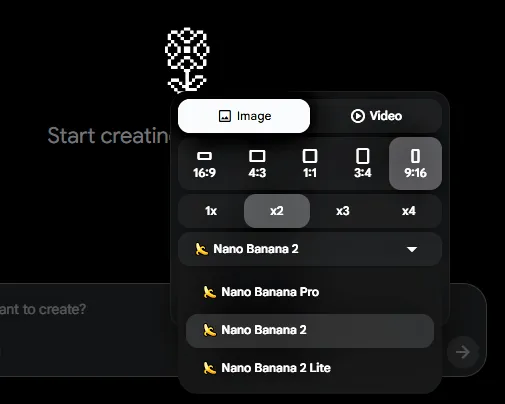
3. Choosing the Right Flow AI Model
One of the biggest mistakes I made was selecting the wrong model. Every model is designed for a different job. Using the wrong one can reduce image quality or increase generation time.
Nano Banana Lite
This model is good for quick testing.
I usually use it when I only want to check whether my prompt is working. It generates results quickly but may not create the highest level of detail.
Best for:
- Testing prompt ideas
- Simple photo edits
- Quick experiments
Nano Banana 2
This became one of my favorite models for realistic photo editing.
It keeps facial details more natural and usually follows prompts better than the Lite version.
Best for:
- Professional portraits
- AI photo editing
- Social media profile photos
- Character editing
Nano Banana Pro
When I wanted more detailed images, this model usually gave the best results.
It may take a little longer, but the final image often looks cleaner and more realistic.
Best for:
- Premium quality images
- Professional portraits
- Fashion edits
- Business photos
Veo Fast
I mostly use this model for creating videos quickly.
If I want to test a scene before making the final version, this is usually my first choice.
Best for:
- Fast video generation
- Quick previews
- Short cinematic clips
Omni Flash
This model worked better for me when I needed smoother motion and better dialogue quality.
It usually takes a little more time, but the final video often feels more natural.
Best for:
- Talking videos
- Story videos
- Character animation
- Professional video projects
4. How to Choose the Correct Image Size
Many beginners ignore the image size, but it can change the final result. I also made this mistake when I first started using Flow AI. After a few tests, I noticed that choosing the right size made my images look much better.
1:1 Square
Best for:
- Instagram posts
- Profile photos
- Product photos
I mostly use this size for AI portraits.
4:3 Size
Best for:
- Professional photos
- Blog images
- Business presentations
This size gives a natural and balanced look.
16:9 Size
Best for:
- YouTube thumbnails
- Wide landscape photos
- Cinematic scenes
I use this size for movie style images and YouTube content.
9:16 Size
Best for:
- YouTube Shorts
- Instagram Reels
- TikTok videos
- Mobile wallpapers
This is my favorite size for AI talking videos and short videos.
Common Image Size Mistakes
These mistakes often reduce image quality.
- Choosing square size for cinematic scenes.
- Using landscape size for Shorts.
- Cropping important parts of the subject.
- Forgetting the final platform before generating.
I now decide the image size before writing the prompt. This simple habit has saved me many failed generations.
5. Why Flow AI Is Not Generating Images
This was one of the first problems I faced. Sometimes I clicked Generate and nothing happened. Other times the generation failed after waiting for several minutes. After many tests, I found that the problem was usually one of these reasons.
- Your Credits Are Finished: Always check your available credits first. Many users spend time changing prompts when the real problem is simply that no credits are left.
- Your Prompt Is Too Confusing: Very long prompts with too many ideas can confuse the model. Instead of describing everything at once, focus on one clear subject. I noticed that simple prompts usually produced cleaner results.
- The Server Is Busy: Sometimes Flow AI servers become busy. During peak hours, image generation may become slow or fail completely. Waiting a few minutes worked better for me than repeatedly pressing the Generate button.
- Your Uploaded Image Has Problems: If your reference photo is blurry, too dark, or cropped badly, the AI may struggle to understand the face. For the best results, I always use a bright photo where the face is fully visible.
Browser Issues
Sometimes the browser creates unexpected problems. These steps helped me several times.
- Refresh the page.
- Clear browser cache.
- Close extra tabs.
- Restart the browser.
- Try again after a few minutes.
6. Quick Prompt Formula That Improved My Results
I tested many prompt styles before finding one that consistently gave better images.
Instead of writing random descriptions, I now follow a simple order.
- Describe the subject.
- Describe the outfit.
- Describe the pose.
- Describe the camera angle.
- Describe the lighting.
- Describe the background.
- Add a short negative prompt.
Here is one simple example.
Create a realistic Indian chef standing inside a clean professional restaurant kitchen. Wear a white chef coat with a black apron and chef hat. Keep a natural smile while holding a freshly prepared Indian dish. Use soft warm kitchen lighting with realistic shadows. Capture the scene using an 85mm portrait lens with a shallow depth of field. Keep the background clean with cooking tools, fresh vegetables, and stainless steel counters. Negative prompt: plastic skin, blurry face, extra fingers, cartoon style, text, watermark.
7. Why Flow AI Changes Your Face
This is one of the biggest problems I faced while testing Flow AI. Sometimes the clothes looked perfect, but the face looked like a different person. In my experience, this usually happened because the reference photo or prompt was not clear enough.
These simple changes helped me keep the face much more natural.
- Use one clear front facing photo.
- Avoid photos with sunglasses or masks.
- Keep the face bright and easy to see.
- Do not use beauty filters before uploading.
- Mention that the face should stay unchanged.
- Use the same reference photo for every scene.
Whenever I changed the reference photo, I noticed that the AI also changed the facial details.
8. Why Your Images Look Artificial
At the beginning, many of my images looked too smooth. The skin looked like plastic and the lighting felt fake. After a few tests, I found that small changes gave much better results.
How I Fixed This Problem
- Use natural lighting instead of dramatic lighting.
- Ask for realistic skin texture.
- Avoid too many beauty words.
- Keep the background simple.
- Use realistic camera settings.
- Generate two or three versions before choosing one.
Most of the time, the second or third result looked much better than the first one.
9. Why Hands and Fingers Look Wrong
Almost every AI image tool struggles with hands sometimes. Flow AI is much better than older models, but it can still make mistakes. I noticed this happened more often when the hands were holding many objects or crossing each other.
Easy Ways to Improve Hands
- Keep one hand visible if possible.
- Avoid very complex poses.
- Hold only one or two objects.
- Write simple hand actions in the prompt.
- Regenerate the image instead of changing the whole prompt.
For example, instead of writing “doing many cooking actions,” I now write “holding a wooden spoon while smiling.” That usually gives cleaner results.
10. Why the Background Looks Wrong
Sometimes I asked for a professional restaurant kitchen, but the AI created a home kitchen. A few times it mixed two different locations in one image.
After testing many prompts, I found that detailed background descriptions work much better. Instead of writing only “restaurant kitchen,” I now describe the environment clearly.
For example:
- Stainless steel counters
- Indian spice boxes
- Copper cookware
- Fresh vegetables
- Warm kitchen lights
- Clean cooking station
The extra details helped Flow AI understand the scene much better.
11. Why Flow AI Videos Fail
Video generation usually takes more time than image generation. Sometimes everything looks correct, but the video still fails.
These were the most common reasons during my testing.
- Server Is Busy: Sometimes many people are using Flow AI at the same time. Waiting for a few minutes worked better than clicking Generate again and again.
- Prompt Is Too Long: Very long prompts sometimes caused failed videos. I now divide long ideas into smaller scenes.
- Credits Finished: Always check your credits before starting a long video project.
- Temporary Bug: Refreshing the page solved this problem several times.
12. Why Characters Do Not Speak Properly
This is another common issue. Sometimes the lips move before the voice starts. Sometimes a few words are skipped. I also noticed that very long dialogues were not always spoken correctly.
Tips That Helped Me
- Keep each dialogue short.
- Write simple sentences.
- Avoid very long paragraphs.
- Use natural punctuation.
- Generate one scene at a time.
This gave me much smoother dialogue videos.
13. Why the Character Changes in Every Scene
This problem confused me the most. The first scene looked perfect, but the second scene suddenly had different hair, different clothes, or even a different face. After many tests, I found that consistency depends on repeating the same information every time.
Keep These Things the Same
- Use the same reference photo.
- Keep the same hairstyle.
- Keep the same outfit.
- Use the same age description.
- Use the same camera style.
- Keep the lighting similar.
- Repeat important identity details in every prompt.
These small habits made my characters much more consistent.
14. Common Prompt Mistakes You Should Avoid
Most image problems are actually prompt problems.
These are the mistakes I made when I first started.
- Writing very long prompts with too many ideas.
- Forgetting to describe the background.
- Changing the reference photo every time.
- Using different camera styles in every scene.
- Adding too many effects.
- Forgetting to mention realistic lighting.
- Not checking the image size before generating.
Keeping prompts simple gave me much better results.
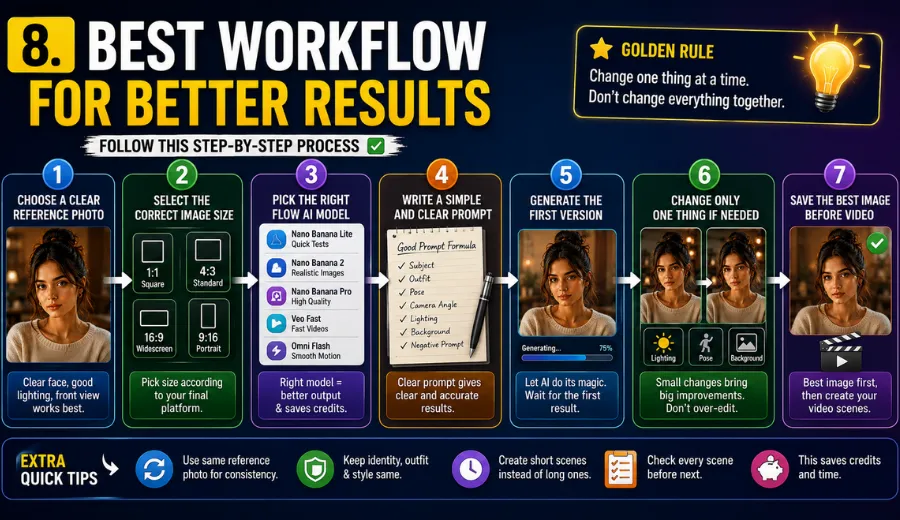
15. My Best Workflow for Creating Better Results
After testing many projects, this is the workflow I now follow almost every time.
- Choose a clear reference photo.
- Select the correct image size.
- Pick the right Flow AI model.
- Write a simple prompt.
- Generate the first version.
- Change only one thing if needed.
- Save the best image before creating the video.
- Create short video scenes instead of one long scene.
- Check every scene before moving to the next one.
This process helped me reduce failed generations and also saved credits.
Last Words
When I first started using Google Flow AI, I thought every problem needed a completely new prompt. After spending many hours testing different settings, I realized that small changes usually made the biggest difference. Choosing the right model, using a clear reference photo, keeping prompts simple, and changing only one thing at a time gave me much better results. I still test new Flow AI features whenever they are released, and every project teaches me something new. I hope this guide saves you time, reduces failed generations, and helps you create better images and videos with more confidence.